How to find large files on Mac, and what to do with them
Four ways to find the biggest files on your Mac, from Storage settings to Finder searches and Terminal, plus how to tell which are safe to delete.
The quickest way to find large files on a Mac is System Settings > General > Storage: click the Info button beside Documents, then choose Large Files. For anything outside your documents, a Finder search by file size reaches the whole disk, and Spotlight in Terminal gives you a full list in seconds. Before you delete anything big, check what it is: old videos and disk images can usually go, while library packages and virtual machine disks belong to apps.
Here are four methods, from the simplest to the most thorough, followed by what usually turns up and how to decide what goes.
Method 1: Storage settings
This is built in and needs no setup. The steps are the same on macOS 15 Sequoia and macOS 14 Sonoma.
- Choose Apple menu > System Settings, click General in the sidebar, then click Storage.
- Wait for the calculation to finish, then click the Info button (i) beside Documents.
- Choose Large Files in the sidebar of the window that opens.
- Click a column heading to sort by name, kind, last accessed date or size.
- Select a file and click Show in Finder to see where it lives.
The same window has a Downloads view and a File Browser that shows how much each folder uses. Apple describes these views in Find and delete files on your Mac.
A warning about the Delete button here: it removes the file immediately, without going through the Bin, and you can't undo it. Use Show in Finder and move the file to the Bin instead unless you are certain.
The limit of this method is scope. Large Files only covers what Storage counts as documents, so big files inside apps, the Photos library, iPhone backups or System Data won't appear.
Method 2: Search by size in Finder
Finder can search the whole Mac for files over any size, and save the search so it updates itself.
- Open a Finder window and press Command-F.
- Click This Mac below the search bar, or the name of a folder to search only there.
- Click the first pop-up menu, which usually says Kind, and choose Other… at the bottom.
- Find File Size in the list. Tick it in the In Menu column so it is quicker next time, then click OK.
- Set the rule to File Size, is greater than, type 1 and choose GB.
- To narrow it down, click the Add button (+) at the end of the row and add Last opened date with is before and a date. That shows big files you haven't opened in a long time.
- Click Save to keep the search as a Smart Folder in the sidebar.
Apple explains Smart Folders in Create or change a Smart Folder on Mac. Finder search runs on Spotlight, so files in folders excluded from Spotlight won't show up, and system files are hidden unless you add a System files rule set to are included.
Method 3: Sort folders by size in Finder
Sometimes the problem isn't one big file but a folder full of medium ones, such as a camera import or a project folder. Finder's list view can show folder sizes, but the option is off by default.
- In Finder, choose Go > Home.
- Choose View > as List.
- Choose View > Show View Options, then tick Calculate all sizes. In your home folder you can also tick Show Library Folder here.
- Click the Size column heading so the largest folder is at the top.
- Open the biggest folder and repeat until you find what is taking the space.
Working out sizes for every folder takes a while on a full disk, so give it a minute before you trust the order.
Method 4: Terminal
Terminal gives the most complete answers, and every command below only reads.
Every file over 1 GB in your home folder
mdfind -0 -onlyin ~ 'kMDItemFSSize > 1000000000' | xargs -0 du -h | sort -hr | head -20
This asks Spotlight's index for files over 1 GB, measures each one and prints the 20 biggest. Because it uses the index, it returns in a second or two. Change 1000000000 to 500000000 for files over 500 MB. The list can include app bundles and items inside ~/Library; those belong to apps, so leave them alone unless you know what they are.
Big files you haven't opened in six months
mdfind -onlyin ~ 'kMDItemFSSize > 1000000000 && kMDItemLastUsedDate < $time.today(-180)'
Same idea, filtered to files last opened more than 180 days ago, going by Spotlight's records. Files Spotlight has never seen opened have no date, so they won't appear here. Keep the single quotes, or the shell will try to read $time itself.
Without Spotlight
If Spotlight is turned off for a folder or an external drive, find reads the disk directly:
find ~/Downloads ~/Desktop ~/Documents ~/Movies -type f -size +500M -exec du -h {} + 2>/dev/null | sort -hr | head -20
This walks those four folders and lists every file over 500 MB with its size, largest first. It is slower than Spotlight because it reads every folder.
The biggest folders in your home folder
du -hd 1 ~ 2>/dev/null | sort -hr | head -15
This adds up every folder one level down from your home folder and sorts them by size. On a large, full disk it can take many minutes, so leave it running. macOS may ask whether Terminal can access some protected folders; you can decline, and those folders are simply skipped.
What usually turns out to be big
The same kinds of file come up on most Macs:
- Videos and screen recordings. Screen recordings in particular are easy to forget, and they save to the Desktop by default.
- Disk images and installers. .dmg, .pkg and .iso files in Downloads, long after the app was installed.
- Archives. .zip files you have already unpacked, and the unpacked folder next to them.
- Virtual machines and containers. Parallels, UTM and Docker Desktop each keep large disk image files.
- Media libraries. Photos, Music, Final Cut Pro and Logic libraries look like single files in Finder but are packages holding thousands of items.
- Project folders. Old code projects with build output and dependency folders, and old design or video projects with render files.
Large files hiding in your Library folder
Some of the biggest items sit in ~/Library, a folder Finder hides by default, so they are easy to miss. The usual ones:
- iPhone and iPad backups in
~/Library/Application Support/MobileSync/Backup. Remove old ones from iOS Files in Storage settings, or from Manage Backups in Finder with the device connected. - Message attachments in
~/Library/Messages. Delete conversations or attachments in Messages itself, not in Finder. - Xcode data in
~/Library/Developer, including build files, simulators and device support files. Xcode rebuilds or downloads them again when needed. - App data in
~/Library/Application Supportand~/Library/Containers, such as offline content from streaming and chat apps. Clear it from the app's own settings where it has an option.
In each case, remove things through the app that owns them. Deleting files inside these folders by hand can leave an app confused or lose data you wanted.
If you find two copies of the same big file, our guide to deleting duplicate files on Mac explains how to confirm they really are identical first.
Before you delete a big file
A few checks save you from deleting the wrong thing:
- Check whether it is a library. If Finder shows the file as a library or package, such as Photos Library, manage it from its app. Deleting items inside the package can damage the library.
- Check whether it is in iCloud Drive. Deleting a file there deletes it on all your devices. If you only want space back on this Mac, Control-click it and choose Remove Download instead, which keeps it in iCloud.
- Move rather than delete when unsure. Copy files you want to keep to an external drive, check the copy opens, then remove the original.
- Empty the Bin. Space only comes back after the Bin is emptied, so check the Bin and empty it once you are happy.
If big files aren't the whole story, the complete guide to freeing up space on Mac covers backups, apps, caches and the rest, and what System Data is on a Mac explains the part of the Storage bar you can't click into.
See it all at once with Headroom
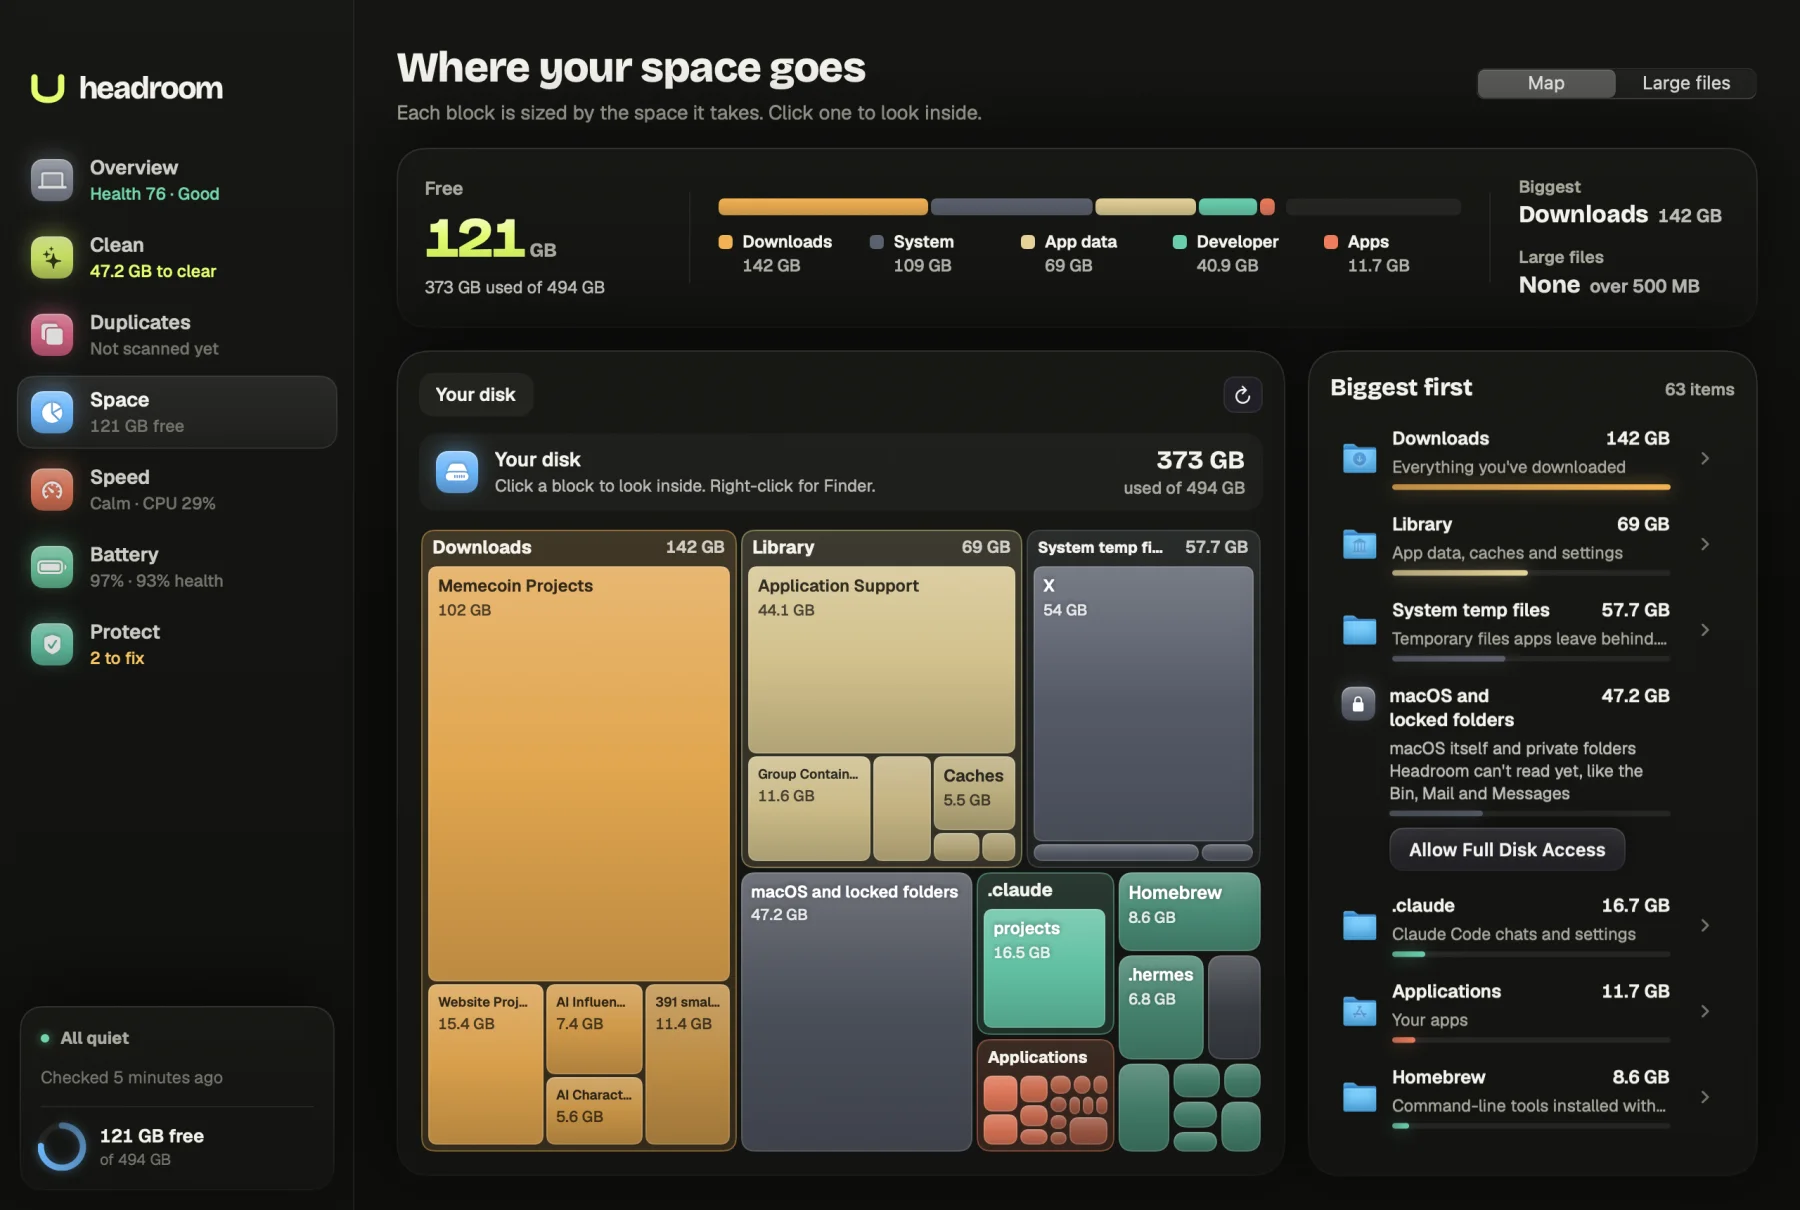
Headroom's Space tab draws your whole disk as an interactive map, biggest blocks first, so a forgotten video or a swollen project folder is obvious at a glance. Click a block to look inside it. The Large Files view lists files over 100 MB, 500 MB or 1 GB in Desktop, Documents, Downloads, Movies, Music and Pictures, with the date each was last opened, and skips things that belong to apps, such as the Photos library, app bundles and Library folders.
Looking is free. The $19 one-time licence lets you move what you choose to the Bin from the same screen, on up to three Macs. Download Headroom.
Questions
How do I see the biggest files on my Mac?
Open System Settings > General > Storage, click the Info button beside Documents and choose Large Files. It lists your files by size, with the date you last opened each one.
How do I search for files by size in Finder?
Press Command-F in a Finder window and choose This Mac. Open the first pop-up menu, choose Other, tick File Size and click OK, then set the rule to is greater than, for example, 1 GB.
Why doesn't Storage settings show all my large files?
The Large Files view belongs to the Documents category, so it only lists files Storage counts as documents. Data counted as apps, photos, backups or System Data doesn't appear there. Finder or Terminal will find those.
Is it safe to delete large files I haven't opened in a long time?
Often, but check what each one is first. Some big files are used by apps without you ever opening them, such as virtual machine disks and media libraries. Move files to the Bin or an external drive rather than deleting them outright, so you can undo it.